
3D & CAD
Jewelry Sketch to Render: From a Pencil Drawing to a Photoreal Image

A sketch-to-render tool turns a photo of your hand drawing into an image that looks like a photograph of the finished piece. You upload the sketch, describe the metal and stones in a sentence, and get a render you can show a client or test with buyers, long before anyone opens CAD or casts metal.
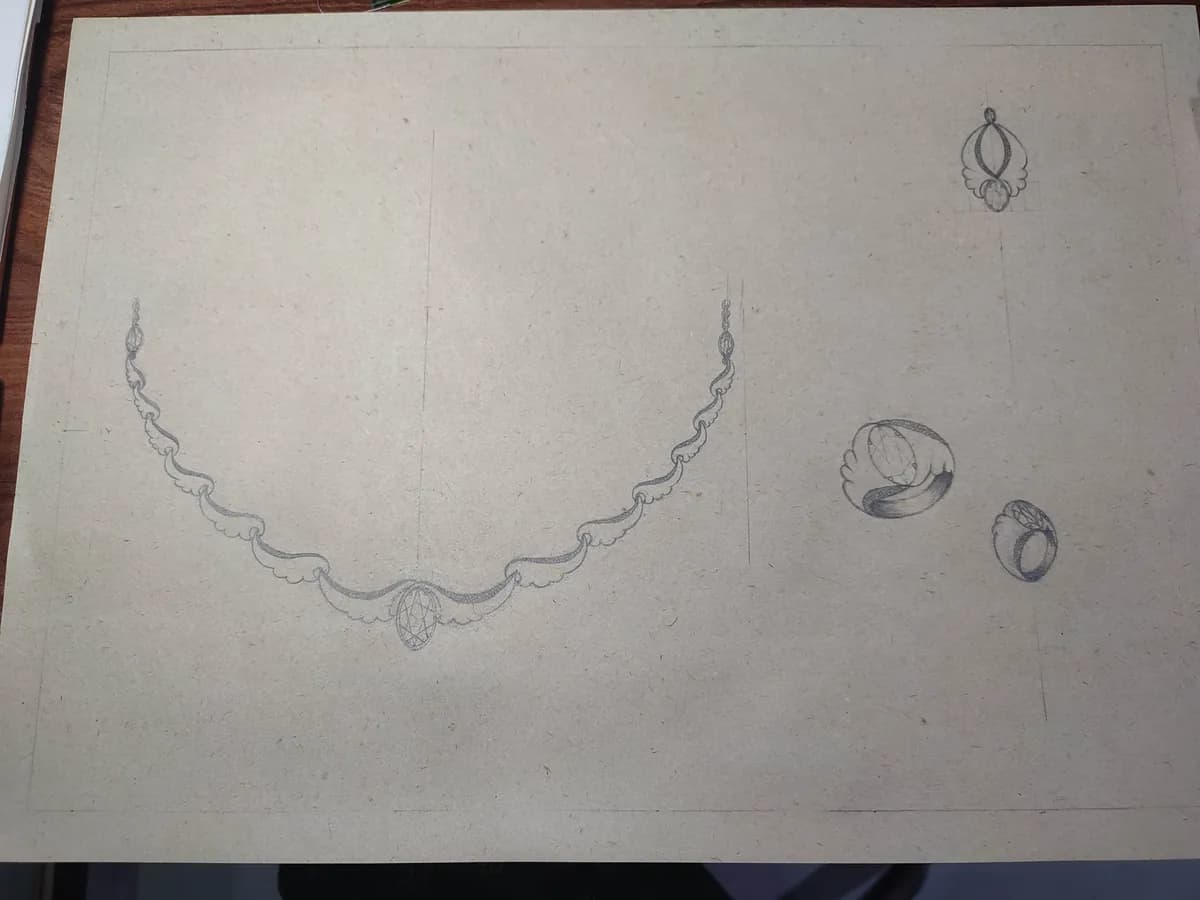 Starting photo
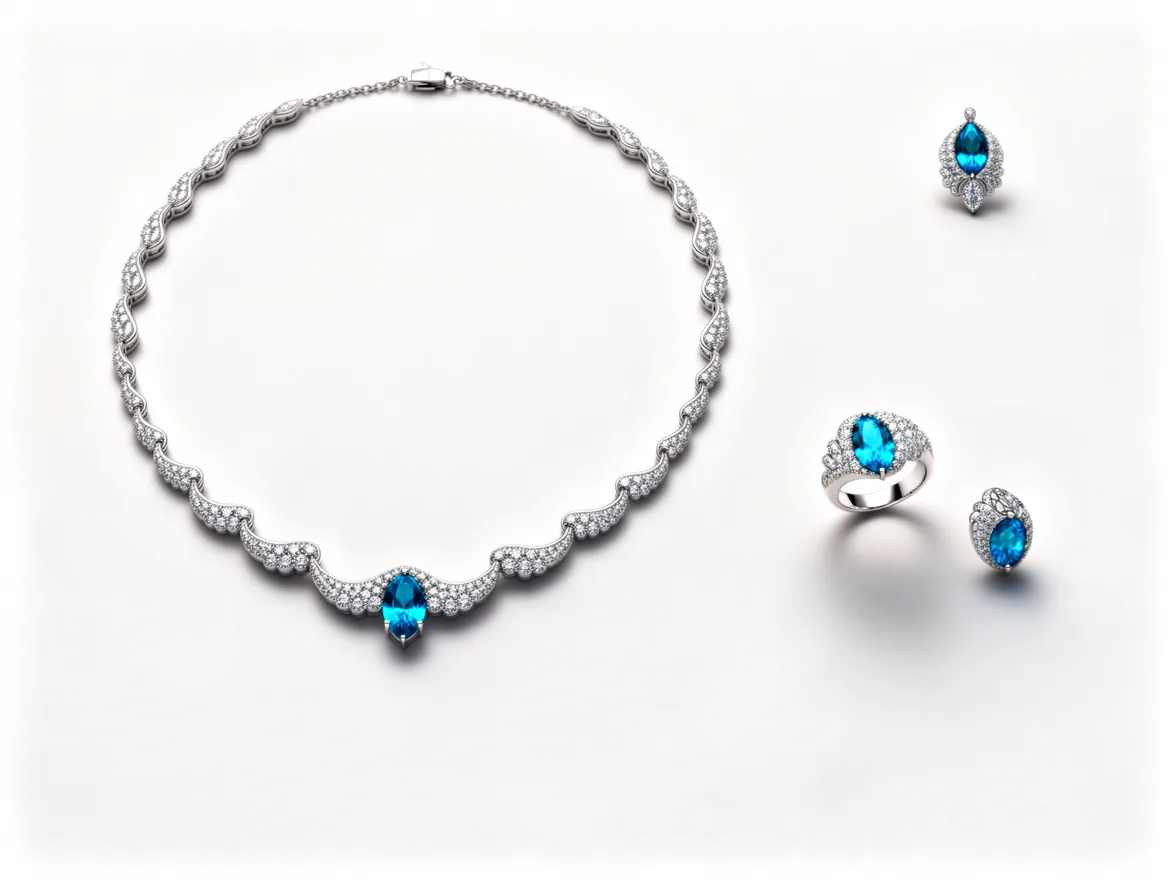 Made with Hues
What a render from a sketch is for
- Client approval: a bespoke client understands a photoreal image far faster than a line drawing
- Pre-selling: put a design in front of buyers or on social media before committing to production
- Line sheets and lookbooks for pieces that exist only on paper
- Choosing between variations, such as two stone colors or two metals, before the CAD work starts
Photograph your sketch so the tool can read it
- Lay the paper flat and shoot straight down, so lines are not distorted
- Use even light with no shadow from your phone or hand across the drawing
- Crop to the drawing, and keep one design per image unless you want them rendered together
- Darken faint pencil lines if needed; the tool can only follow what it can see
- Mark stone positions clearly, even as simple circles or ovals
Describe metal, stones and finish in plain words
The drawing gives the shape; your instruction gives the materials. Be specific about the few things that matter most: metal color, stone color and cut, and finish. An instruction as short as "Make the diamonds blue, with a white gold setting" is enough to steer the result. If a detail matters, such as a milgrain edge or a matte band, say it.
A worked example
The figure at the top of this guide came from one pencil sheet with several designs on it: a scalloped necklace with an oval center stone, a drop earring, and a ring drawn twice from different angles. The instruction asked for blue diamonds in a white gold setting with rounded, bead-like edges. The render kept the scalloped outline of the necklace, the position of the center stone and the shape of the earring, and filled the pavé in.
What it changed is just as useful to know. The render shows one clear ring and turns the second drawing into a smaller piece that reads more like an earring, most likely because the sheet doesn't say the two drawings are the same ring. A note in the sketch or the instruction ("two views of one ring") is the fix.
What to expect, and the limits
The tool interprets your drawing. It keeps the overall form and layout, but small details, the exact number of stones in a pavé row, or proportions that are only hinted at may come out differently from what you had in mind. Treat the render as a picture of the idea, not a specification: it is not a manufacturing file, and dimensions, stone sizes and settings still need to be resolved in CAD.
Common problems and how to fix them
- Faint or broken pencil lines: details get dropped. Go over the key lines with a darker pencil or a fine pen.
- Photographed at an angle: the piece comes out warped. Shoot straight down with the paper flat.
- Several designs on one sheet: they may be merged or skipped. Crop to one design, or say in the instruction which pieces you want.
- Stones not marked: the tool guesses where they go. Draw each stone position, even as a simple outline.
- Vague instructions: "make it nice" gives a generic result. Name the metal, the stone color and any finish you care about.
Trying metal and stone variations
Once you have one render, variations are cheap. Run the same sketch with yellow gold instead of white, or emeralds instead of sapphires, and put the versions side by side for the client. For changes to an existing photo or render, such as swapping the metal color or a center stone, a metal and stone color tool edits the image you already have instead of starting from the sketch again.
Where it fits: sketch, render, CAD, cast
Most workshops already run sketch, then CAD, then casting. A render slots in between the sketch and CAD, where changes are cheapest: the client approves the look from the render, the CAD designer works from an approved image, and fewer revisions reach the expensive stages. Once the CAD exists, a CAD visualizer can render the screenshot again, this time from the exact model.